

Today, Onlive Server Hosting company will tell you how to Install/Configuration
of Drupal on CentOS 7 without CPanel/WHM. Drupal is a free content management platform
that give the facility to organized and managed your content. It has a
user-friendly interface that makes customizing your content easy and simple
with little effort.
In this guide, we will
demonstrate how to install How to Install Drupal on Centos7.
1. Login to your server via
SSH or KVM, via root.
2. Disable selinux.
setenforce 0
sed -i ‘s/enforcing/disabled/g’
/etc/selinux/config
3. Run the following command
to install all the required packages for your Apache & MySQL stack, which
will host the Drupal website.
yum install httpd
mariadb-server mod_ssl -y
4. Now, install a version of
PHP above 5.5.9 to be compatible with Drupal 8 and nano.
yum install
centos-release-scl -y
yum-config-manager
–enable rhel-server-rhscl-7-rpms -y
yum install
php55 php55-php-gd php55-php-mysqlnd php55-php-pdo php55-php-json
php55-php-curl php55-php-fpm php55-php-mbstring php55-php-opcache nano -y
5. Run the following
commands to the file /etc/httpd/conf.d/php.conf, this allows for Apache to pass
the requests to PHP-FPM.
echo
‘<IfModule !mod_php5.c>’ >> /etc/httpd/conf.d/php.conf
echo
‘<FilesMatch \.php$>’ >> /etc/httpd/conf.d/php.conf
echo
‘SetHandler “proxy:fcgi://127.0.0.1:9000″‘ >> /etc/httpd/conf.d/php.conf
echo
‘</FilesMatch>’ >> /etc/httpd/conf.d/php.conf
echo
‘</IfModule>’ >>
/etc/httpd/conf.d/php.conf
6. Update the Apache config to
allow for htaccess and PHP to be used. Also, update the timezone
configuration in PHP (drupal will require this later).
sed -i
‘s/AllowOverride [Nn]one/AllowOverride all/g’ /etc/httpd/conf/httpd.conf
sed -i
‘s/DirectoryIndex index.html/DirectoryIndex index.php index.html/g’ /etc/httpd/conf/httpd.conf
sed -i
‘s/;date.timezone =/date.timezone = “America\/New_York”/g’
/opt/rh/php55/root/etc/php.ini
7. Start Apache & MySQL
on the server.
systemctl
start httpd && systemctl start php55-php-fpm && systemctl start
mariadb
8. You should now be able to confirm that Apache is started by going to either
the domain name you have pointed to the server, or your server IP address. In this example, we are using the server IP address.
9. Now, create the MySQL user and database for Drupal. Enter the mysql command to
get to a prompt (pick a different password to the below one, just make sure it is safe!).
mysql
CREATE
DATABASE drupal;
GRANT ALL
PRIVILEGES ON drupal.* TO ‘drupal’@’localhost’ IDENTIFIED BY ‘Eh4wph8WItSO’;
10. Download and put into place the most recent version of Drupal. Find the latest version of
Drupal by visiting the Drupal website https://www.drupal.org/download
(at the time of writing this is 8.2.1).
tar zxvf
drupal-8.2.1.tar.gz
rmdir
/var/www/html
mv
drupal-8.2.1 /var/www/html
11. Update the permissions so that files can be uploaded through the Drupal control panel.
chown -R
apache:apache /var/www/html
12. To complete the Drupal installation, go to your website URL or IP address in the browser. There will be following pages you should go through
to complete the installation process.
Your server must verify all of the requirements with this
configuration and continue past the “Verify requirements” screen.
On the following page, enter the details that you used earlier when
creating the MySQL database.
Now enter the details that you
wish for the website. The installation will
get completed and automatically redirect to the Drupal admin
panel.
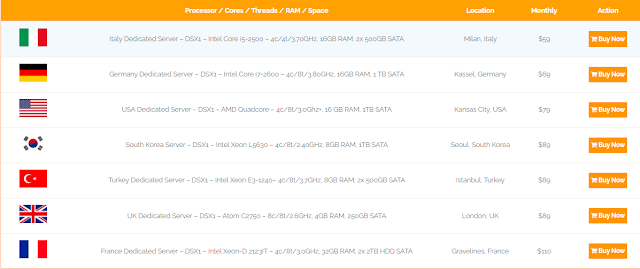
We deliver scalable, high
availability USA Dedicated Server Hosting and UK Dedicated Server
Hosting solutions. With excellent DDOS Protection Services, we can
help cut your hosting costs, accentuate your business growth and improve your
website's productivity.
For more information Visit - https://www.youtube.com/watch?v=K7ZBrOh4nJY


0 Comments
Your Post is Publishing